One mistake after a storm can quietly cost you thousands of dollars. Homeowners across Nebraska, Iowa, Colorado, Texas, and Florida often file claims without realizing they’ve left significant money on the table by skipping a few critical steps. The good news is that a clear, well-organized checklist can change that outcome entirely. This guide walks you through every stage of the storm insurance claim process, from your first minutes after the damage to reviewing your final settlement offer, so you can recover fully and confidently.
Table of Contents
- How to evaluate storm damage before making a claim
- The ultimate storm damage insurance claim checklist
- Comparison: what insurers expect vs. what experts recommend
- How to handle adjusters, contractors, and common claim pitfalls
- What most homeowners miss when filing claims, and what to do instead
- Expert help for your storm insurance claim
- Frequently asked questions
Key Takeaways
| Point | Details |
|---|---|
| Act fast after storms | Prioritize safety, prevent further damage, and document everything right away. |
| Document and save receipts | Take clear photos and videos before cleanup, and keep every repair-related receipt. |
| Follow a thorough checklist | A detailed, step-by-step process increases claim accuracy and payout. |
| Get expert help | Public adjusters and experienced contractors can help maximize your settlement and avoid pitfalls. |
| Beware of fraud | Always hire reputable, registered contractors and review all settlement offers before signing. |
How to evaluate storm damage before making a claim
Now that you understand why following the right process matters, let’s start with the steps you need to take before you even call your insurance company. These early actions set the foundation for everything that follows.
Safety comes first, without exception. Walk through your home carefully and look for structural hazards like sagging ceilings, cracked load-bearing walls, broken glass, or downed power lines near the property. If anything looks unstable, leave the area and contact local authorities before re-entering. No insurance claim is worth a personal injury.
Once you’ve confirmed the space is safe, your next priority is stopping additional damage from occurring. This is called mitigation, and it’s a requirement under most homeowner insurance policies. Cover broken windows and roof openings with tarps or plywood boards. Move wet furniture and personal belongings away from damaged areas. If water is still entering the home, do what you reasonably can to stop it. And critically, keep every single receipt for materials you buy, because insurers can reimburse these emergency costs.
A solid storm damage inspection checklist helps you move through this process systematically, so nothing gets overlooked in a stressful moment.
Document everything before cleanup begins. Take wide-angle shots that show the full room or exterior wall, then follow up with tight close-up photos that capture specific damage like cracked shingles, dented gutters, or waterlogged insulation. Video walkthroughs are especially useful because they provide context that individual photos miss. The storm-claim workflow best practice is clear: prioritize safety first, prevent further damage with tarps or boards, document thoroughly, then contact your insurer promptly and be prepared for the adjuster inspection.
“Document everything before you start cleaning up. The evidence you preserve in those first hours is often the most valuable evidence you’ll have.”
Pro Tip: Start a dedicated folder on your phone or computer just for this claim. Label it with the storm date and address, then drop every photo, video, receipt, and note into it immediately. This simple habit has saved homeowners from significant disputes later.
The ultimate storm damage insurance claim checklist
With your initial assessment done, it’s time to follow this detailed checklist to make sure your claim is thorough and positions you for the best possible outcome.
-
Photograph and video all damage before touching anything. Capture wide shots, close-ups, and video walkthroughs. Document before cleanup with time-stamped photos and videos of the entire affected area, and gather receipts for any emergency repairs you’ve made.
-
Complete emergency mitigation and save all receipts. Cover open areas, pump out standing water, and do whatever is reasonably necessary to stop the damage from growing. Every dollar you spend on materials can potentially be reimbursed.
-
Create a written inventory of damaged items. List every piece of furniture, appliance, personal property, or structural element that was affected. Include model numbers and estimated values where possible.
-
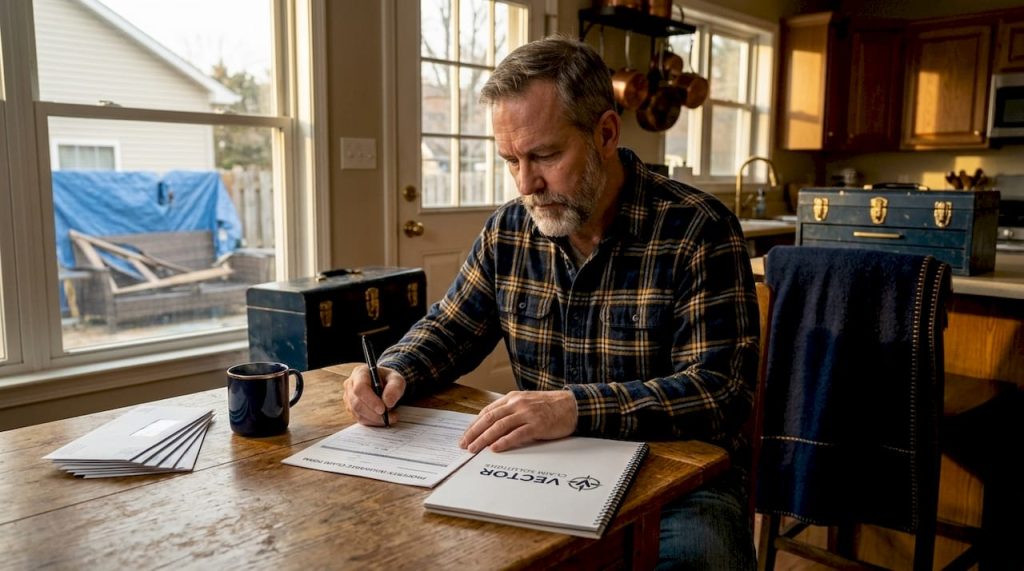
Contact your insurance company to open the claim. Call your insurer’s claims line as soon as possible, typically within 24 to 48 hours. Get a claim number and keep a record of everyone you speak with, including the date and time of each conversation.
-
Review your policy before the adjuster visits. Understand your deductible (the amount you pay before coverage kicks in), your coverage limits, and whether your policy covers actual cash value or replacement cost value. These details directly affect your settlement.
-
Prepare for the adjuster inspection. The Iowa Insurance Division recommends taking photos and videos, keeping a detailed written description of all damage, saving receipts for mitigation materials, being present during the adjuster’s visit, and obtaining estimates from registered contractors. Being present allows you to point out damage the adjuster might otherwise miss.
-
Obtain at least two estimates from registered contractors. Independent contractor estimates provide a reality check against the insurer’s assessment and give you solid documentation to negotiate from.
-
Review the settlement offer carefully. Compare it line by line against your documentation and contractor estimates. If the offer seems low, you have the right to negotiate or dispute it.
-
Know when to call a public adjuster. If the damage is extensive, the claim is complex, or the insurer’s offer is significantly below your estimates, it may be time to consider calling a public adjuster. A public adjuster works exclusively for you, not for the insurance company.
-
Keep all records until the claim is fully resolved. Retain every document, photo, receipt, and communication related to the claim, even after repairs are complete.
Understanding how property claims work from start to finish helps you stay organized and reduces surprises along the way.
A critical warning about contractor fraud: After widespread storms, contractors who go door to door offering fast, cheap repairs are common in storm-affected communities across Iowa, Nebraska, Texas, and Colorado. The Iowa Insurance Division specifically warns homeowners to be cautious of these storm chaser contractors, who often take deposits and disappear or deliver substandard work. Always verify a contractor is registered in your state and check online reviews before signing anything.
Pro Tip: Never sign an Assignment of Benefits (AOB) document without talking to a professional first. This document transfers your insurance claim rights to the contractor, which can seriously limit your ability to manage or dispute the claim later.
Comparison: what insurers expect vs. what experts recommend
Knowing the checklist is important, but understanding how expert advice stacks up against standard insurer expectations reveals exactly where homeowners tend to leave money behind.
| Claim step | What insurers typically require | What experts recommend |
|---|---|---|
| Documentation | Photos of visible damage | Wide + close-up photos, time-stamped video walkthroughs, written inventory |
| Emergency repairs | Notify insurer, prevent further damage | Keep all receipts for reimbursement; document before and after |
| Contractor estimates | One estimate acceptable | At least two estimates from registered, reputable contractors |
| Adjuster visit | Allow access | Be present, guide the adjuster, point out all affected areas |
| Settlement review | Accept or call to dispute | Compare line by line against contractor estimates; negotiate with documentation |
| Claim timeline | File promptly | File within 24 to 48 hours; follow up in writing at every stage |
| Hidden damage | Visible damage only | Inspect attic, insulation, HVAC, and structural components that may not be obvious |
The gap between basic requirements and expert-level practice is where underpayments happen. Insurers are not necessarily trying to shortchange you, but their adjusters are working quickly across many claims and may miss items that aren’t clearly documented or pointed out.
Going beyond the basics also protects you from a process called scope creep, where repairs reveal additional damage that wasn’t included in the original settlement. If you have an advanced documentation checklist in place from day one, you’re far better positioned to reopen or supplement the claim when additional damage surfaces.
Key takeaways from the comparison above:
- Independent contractor estimates are your most powerful negotiating tool.
- Being present during the adjuster inspection is not optional if you want full coverage.
- Documentation quality, not quantity, determines how strong your claim is.
- Hidden structural and mechanical damage from storms is frequently missed and should be proactively inspected.
How to handle adjusters, contractors, and common claim pitfalls
Armed with your documentation and checklist, the next challenge is navigating the actual claim interactions without making costly mistakes.
When the adjuster arrives, be present and be prepared. Walk the adjuster through every area of damage yourself. Don’t assume they’ll find everything. Point out damage to the roof, gutters, siding, windows, foundation, fencing, and any outbuildings. Show them your photos and documentation. If they move quickly through certain areas, respectfully ask them to look more closely.
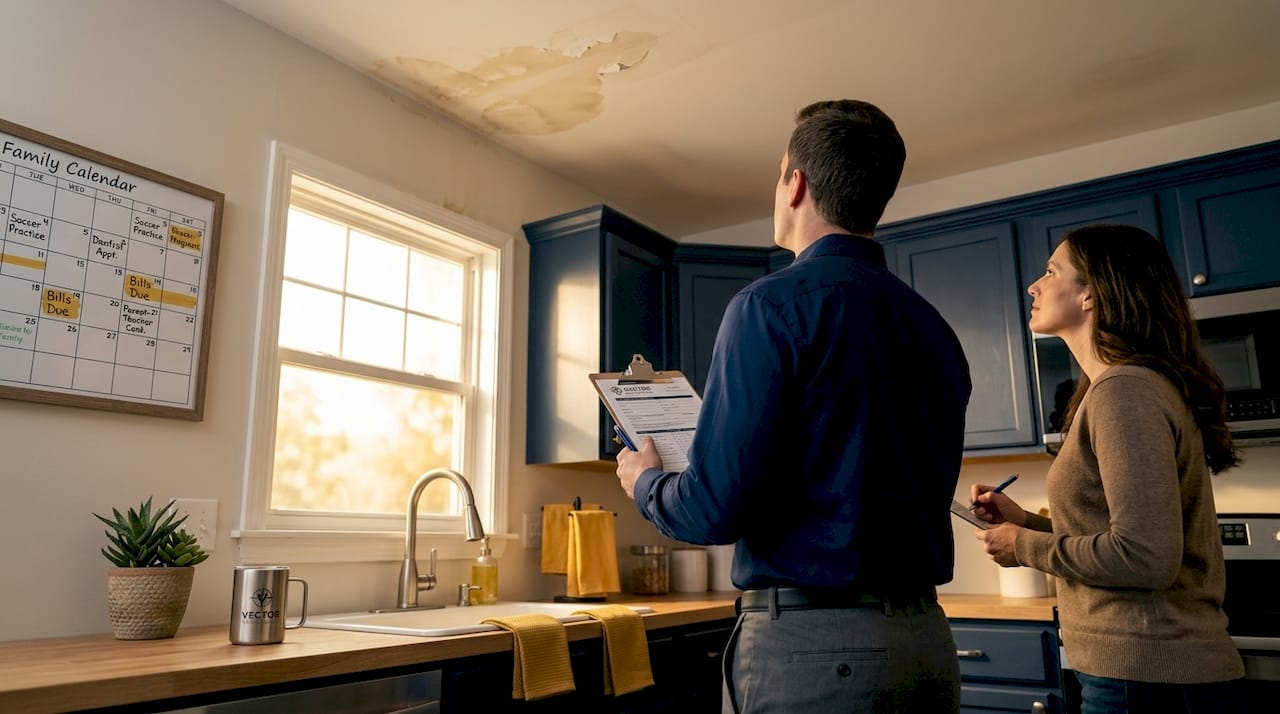
The Iowa Insurance Division guidance on hail claims is clear: being present while the adjuster assesses the property, and actively pointing out all affected areas, is one of the most important steps you can take. An adjuster who misses damage is not automatically coming back to fix that oversight.
If you suspect the adjuster missed significant damage, you have options. You can request a re-inspection, provide additional documentation, or bring in a public adjuster to conduct an independent assessment. Learn more about what to do when an adjuster misses damage so you know exactly what steps to take.
“If your settlement offer doesn’t cover the actual cost of restoring your home to its pre-storm condition, that offer is not final. You have the right to negotiate.”
For contractor selection, follow these guidelines:
- Verify the contractor is licensed and registered in your state.
- Check reviews on independent platforms and ask for local references.
- Get written, itemized estimates before any work begins.
- Never pay the full amount up front; a reasonable deposit is typically acceptable, but final payment should follow completed work.
- Avoid contractors who offer to waive your deductible, as this practice is considered insurance fraud in most states.
For homeowners working through residential claim support, having a knowledgeable advocate involved during these stages makes a measurable difference in outcomes.
If your settlement comes back lower than expected, start by comparing it to your contractor estimates and your own documentation. Write a formal letter to your insurer explaining the discrepancy and providing supporting evidence. Keep communication professional and factual. If negotiations stall, a public adjuster or an attorney specializing in insurance disputes can help escalate the matter appropriately.
What most homeowners miss when filing claims, and what to do instead
Here’s something worth saying plainly: most homeowners are reasonable, honest people who trust that their insurance company will assess the damage fairly. That trust is not always misplaced. But it is often incomplete.
The gap we see most consistently is not about dishonesty on either side. It’s about information. Insurance adjusters are often overloaded after major storm events, working through dozens of claims in a short period. A rushed inspection on your property might cover the obvious damage but miss the less visible items, like hail damage to an HVAC unit on the roof, impact damage to flashing or pipe boots, or moisture intrusion that hasn’t surfaced yet as interior staining.
Homeowners who accept the first settlement offer without independent verification are the ones who later discover the repair costs were higher than expected and have no recourse. That extra $4,000 to $8,000 gap between the settlement and actual repair costs is a real and common outcome.
The single most effective thing you can do is obtain independent contractor estimates before agreeing to any settlement. This one step, more than any other, gives you leverage and clarity. Combine that with thorough early documentation and a willingness to push back when numbers don’t align, and you’ve changed your outcome significantly.
Expert support at the right moment multiplies results even further. Storm damage claims handled with professional guidance consistently result in more complete settlements because every affected component is identified, documented, and priced correctly from the start. The upfront effort always pays off.
Expert help for your storm insurance claim
Navigating a storm claim on your own is possible, but it’s also where critical details get missed and settlements get accepted that don’t reflect the real cost of repair.

At Vector Claim Solutions, we work exclusively on behalf of policyholders like you. We review your damage, identify what your policy actually covers, and negotiate with your carrier to make sure the settlement reflects the full scope of what’s needed to restore your home correctly. Whether you’re dealing with a fresh storm loss or a claim that feels like it stalled, our team brings construction-level analysis and structured negotiation to every case.
Explore our full storm damage claims help or download our storm claim documentation checklist to start building a stronger claim today. For personalized support, our residential claim specialists are ready to help you move forward.
Frequently asked questions
What should I do immediately after my home is damaged by a storm?
Get everyone to safety first, then take steps to prevent further damage with tarps or boards, and document the scene thoroughly with photos and videos before cleanup begins. The correct workflow follows this order: safety, mitigation, documentation, then contact your insurer promptly.
Do I need receipts for temporary repairs to get reimbursed?
Yes. Insurers often reimburse reasonable emergency or temporary repair costs when you submit itemized receipts along with before and after photos, so keep every receipt from the start.
How do I make sure my insurance settlement is fair?
Obtain estimates from at least two registered contractors, compare them to the insurer’s settlement offer line by line, and negotiate using your contractor estimates and documentation as supporting evidence.
Should I be present when the insurance adjuster visits?
Absolutely. Being present allows you to point out all affected areas and make sure nothing is overlooked, which is one of the highest-impact steps in the entire claim process.
How can I protect myself from contractor scams after a storm?
Only hire contractors who are licensed and registered in your state, verify their reputation through independent reviews, and never pay in full before the work is complete.