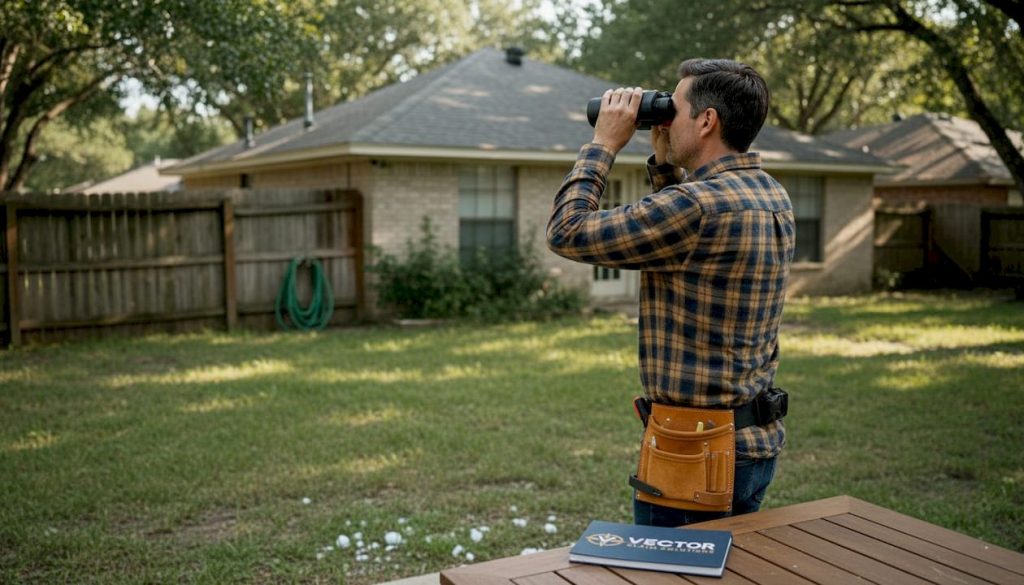
After a hailstorm rolls through, many homeowners walk outside, glance up at their roof, and figure everything looks fine because there are no obvious missing shingles. That assumption costs thousands of dollars every year in denied insurance claims. The reality is that hail damage is often subtle, spread across hundreds of impact points that are easy to miss from the ground. Granule loss, micro-cracks, and loosened shingle tabs may not look like much, but they compromise your roof’s ability to shed water and protect your home. This guide shows you exactly what to look for, how to document it, and why getting it right matters for your claim.
Table of Contents
- Why it’s critical to spot hail damage early
- Visual signs of hail damage on different roof materials
- How experts inspect and document hail damage
- Applying your findings: Steps for a strong insurance claim
- Why homeowner intuition (not just expert methods) matters in hail claims
- Get help maximizing your hail damage claim
- Frequently asked questions
Key Takeaways
| Point | Details |
|---|---|
| Early detection matters | Quickly spotting hail damage helps preserve roof health and boosts insurance claim success. |
| Material-specific signs | Hail damage looks different on asphalt shingles, metal, and tile—know what to expect for your roof type. |
| Document with care | Careful photo evidence and impact counts make your claim stronger and easier to approve. |
| Expert support pays off | Professional help can improve outcomes and reduce headaches during claim negotiation. |
Why it’s critical to spot hail damage early
Timing is everything when it comes to roof damage claims. Most insurance policies have strict deadlines for reporting storm damage, and carriers can deny claims outright if they believe damage is pre-existing or caused by deferred maintenance rather than a specific storm event. Identifying hail damage promptly gives you a clear storm date to reference, which is one of the most important anchors in any successful claim.
Beyond the insurance deadline issue, there is a structural reality that homeowners often underestimate. Hail doesn’t just knock shingles loose. It compromises the protective surface layer, weakens the bond between shingle layers, and creates entry points for moisture. Left unaddressed, even small bald spots and hairline cracks can lead to water intrusion, decking rot, and mold growth over the following months.
Don’t wait for a leak to confirm hail damage. By the time water shows up on your ceiling, the damage has already progressed far beyond what was visible after the storm.
Common visual signs of hail damage on asphalt shingle roofs include missing or partially missing shingles, lifted or loosened tabs, cracks, tears, dents at individual impact points, and shingle warping, cupping, and fishmouthing. Hail also knocks off protective granules, revealing discolored or bald spots on the shingle surface.
Here is a quick summary of why each sign matters for both your roof and your claim:
- Missing shingles: Immediate weather exposure, strong indicator of storm impact for adjusters
- Lifted or loosened tabs: Allows wind-driven water to enter beneath the shingle layer
- Cracks and tears: Reduces waterproofing integrity, creates long-term leak risk
- Bald spots from granule loss: Accelerates UV degradation, shortens roof life by years
- Warping and cupping: Signals structural stress at the shingle level, may indicate widespread pattern damage
Now that you know why accurate identification is vital, let’s break down what hail damage actually looks like depending on your specific roof material.
Visual signs of hail damage on different roof materials
Not every roof responds to hail the same way. Impact damage manifestations differ by roof covering, meaning what you’re looking for on an asphalt shingle roof is very different from what you’d expect on a metal or tile roof. Inspecting based on the wrong visual cues is a common mistake that leads homeowners to either miss real damage or mischaracterize what they’ve found.
The IBHS impact ratings program provides science-based ratings for impact-resistant shingles and frames hail damage assessment around specific damage modes including granule loss, dents, and surface cracks. These same categories are useful benchmarks when you’re doing your own visual inspection regardless of roof type.
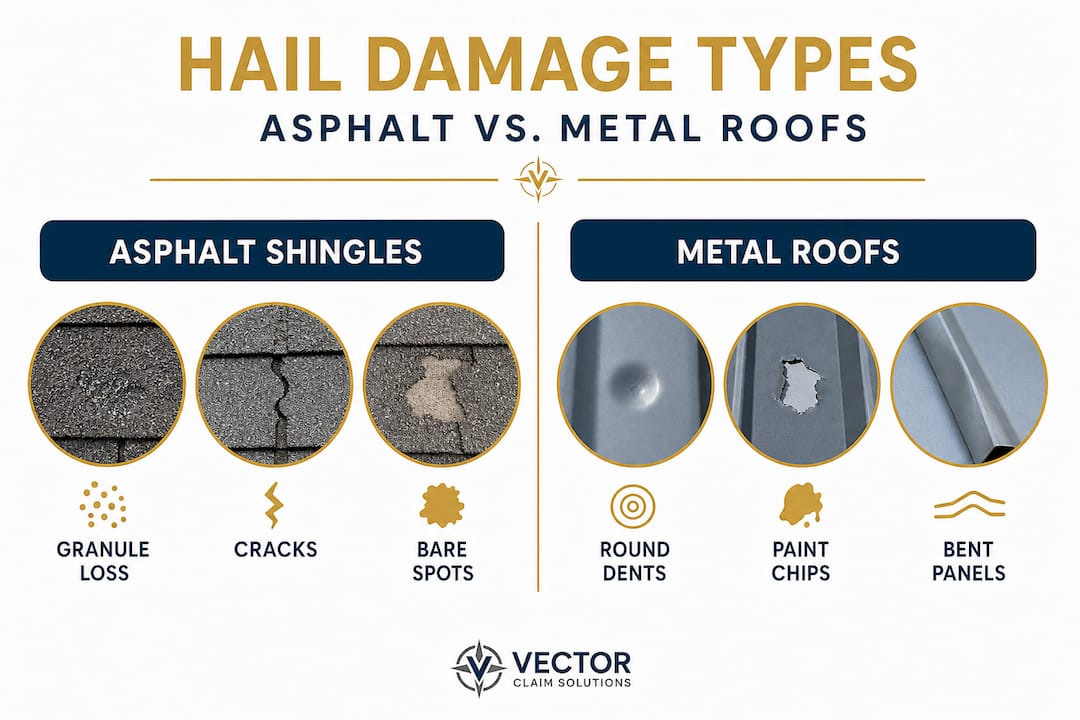
| Roof material | Primary hail damage signs | What to look for |
|---|---|---|
| Asphalt shingles | Granule loss, cracks, fishmouthing | Bald patches, color change, lifted edges |
| Metal roofing | Dents, surface cracks, displaced fasteners | Circular depressions, paint chipping |
| Tile (clay/concrete) | Chips, cracks, broken corners | Fracture lines, missing corners, debris on deck |
| Wood shake | Splits, bruising, impact marks | Orange wood exposed beneath weathered surface |
Asphalt shingles are by far the most common roof type in Nebraska, Iowa, Colorado, Texas, and Florida. After a hailstorm, you’re looking for:
- Granule loss: The most common sign. Hail knocks granules loose, leaving exposed, often darker-colored fiberglass or organic mat beneath. Check your gutters and downspout discharge areas for heavy granule buildup, which is a strong secondary indicator.
- Fishmouthing: This term describes when the lower edge of a shingle tab curls upward, breaking the seal strip bond. It often follows repeated impact that destabilizes the adhesive.
- Random impact cracking: Unlike wind damage, which tends to follow a directional pattern, hail damage appears random, scattered across the surface in no consistent orientation.
- Bruising: Press lightly on a suspect area. If the shingle feels soft or spongy beneath the surface, the mat has been damaged internally without breaking through. This is called bruising and it is a legitimate claim item.
Metal roofs show damage differently. Hail leaves circular or oval dents, particularly visible at low sun angles when you’re on the roof. Surface cracks in coatings and paint are common around impact points. Displaced or loosened fasteners can also occur after significant hailstorms and compromise the panel’s ability to stay water-tight.
Tile roofs, common in Texas and Florida, are brittle by nature. Hail causes chips and fracture lines that may not be visible from the ground. Broken corners are a frequent outcome, and even a tile that appears intact may have hairline cracks that expand under thermal cycling.
Pro Tip: Walk your yard and fence line after a storm. Dents in your gutters, soft metal vents, or paint damage on wood siding are strong corroborating evidence of hail size and impact force, which supports your hail damage claim review significantly.
You can also use our detailed hail inspection checklist to walk through each roof area systematically and capture the right evidence before you file.
Understanding visual damage is important, but how do experts document it for claims?
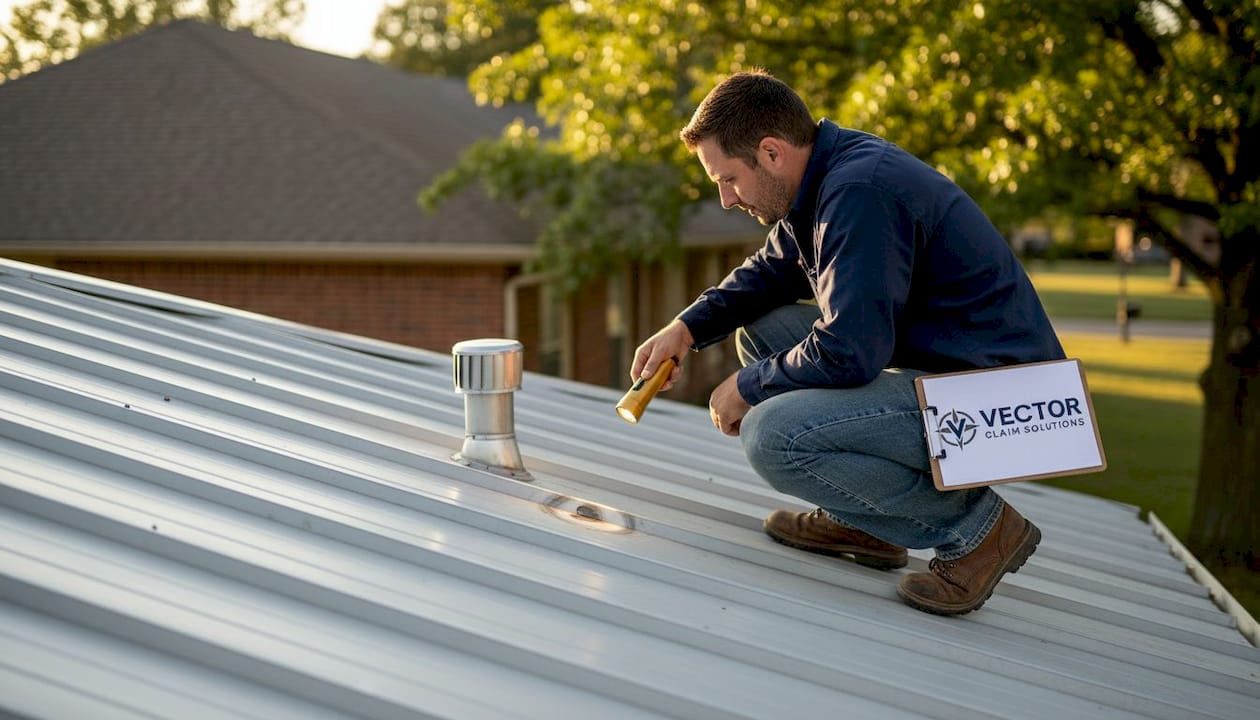
How experts inspect and document hail damage
Insurance adjusters and public adjusters use a structured method to quantify hail damage, and understanding that method puts you in a much stronger position as a policyholder. The standard approach involves dividing the roof into defined test squares, typically 10-by-10-foot sections, and then counting the number of impact points within each square.
A commonly cited damage threshold is eight or more impacts per 100 square feet as a benchmark for functional damage on asphalt shingles, though policies and carriers vary on this standard. The key is that extrapolation from a small sample should be treated as probabilistic, not as an absolute picture of the entire roof. Where the inspector places those test squares matters enormously, and a carrier-side adjuster may choose locations that minimize impact counts.
Here is how a thorough inspection and documentation process typically works:
- Document the storm date first. Use NOAA storm data, local weather reports, or a hail tracking service to confirm the storm event. This establishes the cause of loss and protects against a “pre-existing damage” denial.
- Photograph the entire roof before touching anything. Take wide-angle photos first, then close-ups of each impact point, bald spot, crack, and tab lift. Always include something for scale, such as a coin or ruler.
- Conduct test squares across multiple roof sections. Don’t just sample one area. Run test squares on each roof slope, including north and south facing sections, because hail often comes in at an angle and damages slopes differently.
- Count and record impacts per square. Note the location of each test square (slope direction, distance from ridge and eave) so your findings can be reproduced and verified.
- Document secondary damage indicators. Gutters, downspouts, vents, skylights, and roof penetrations all tell a supporting story. Photograph dents and impact marks on every soft metal surface.
- Compile your documentation into a single organized file. Include a written summary, date-stamped photos, and a simple diagram of where each test square was located.
The claim negotiation process often hinges on who has better documentation. When your evidence is organized, specific, and reproducible, it becomes much harder for a carrier to dismiss.
Pro Tip: If a carrier adjuster comes out and only samples one or two squares on one slope, that is a red flag. Ask them to document their methodology in writing and request test square locations in the inspection report. Then compare their sampling to your own documentation.
Understanding whether your roof needs repair or full replacement is a critical decision that affects your claim. Our repair vs. replacement guide covers how insurance carriers calculate this and what factors support a full replacement scope.
With inspection and documentation covered, let’s see how to apply these insights to maximize your claim.
Applying your findings: Steps for a strong insurance claim
Knowing what damage looks like and how to document it only works if you apply that knowledge in a structured way before and during the claims process. Here is a step-by-step approach that helps policyholders build the strongest possible case:
- Inspect within days of the storm, not weeks. New storms, cleaning, or foot traffic on the roof can alter the evidence. The sooner you document, the cleaner your timeline.
- Hire a licensed contractor for a written inspection report. Your own photos are valuable, but a signed, dated contractor report adds credibility to your documentation package.
- File your claim promptly and reference the specific storm date. Include your documented evidence when you notify your carrier. Don’t wait to see how much the adjuster finds on their own.
- Compare your documentation to the carrier’s estimate. When you receive the adjuster’s report, review it line by line. Are all damaged areas included? Is the replacement scope consistent with what you observed?
- Challenge underpayments in writing with supporting evidence. If the carrier’s estimate excludes areas you documented, write a formal supplemental claim and attach your photos and contractor report.
- Consider bringing in a public adjuster for complex or denied claims. Public adjusters (licensed professionals who represent policyholders, not carriers) can re-inspect, rebut carrier findings, and negotiate directly with your insurance company.
It’s worth noting that small sample test squares can over- or underestimate roof-wide hail impact density depending on where and how samples are chosen. Treat any single-sample conclusion as a starting point, not a final answer, and document broadly across your roof to counterbalance selective sampling.
Pro Tip: Keep a physical folder with every piece of documentation related to your claim, including emails, inspection reports, carrier correspondence, and photos. If your claim ends up in dispute or appraisal, this folder is your most valuable asset.
Use our insurance inspection checklist to make sure you haven’t missed any documentation step, and connect with our team for claim support if your carrier’s response doesn’t match what your inspection revealed.
Now, let’s step back and look at what actually matters in hail claim success from a seasoned expert’s perspective.
Why homeowner intuition (not just expert methods) matters in hail claims
Here is something most technical guides won’t tell you: the homeowners who get the best outcomes on hail claims are not necessarily the ones who know the most about roofing. They’re the ones who stay persistent, ask questions, and refuse to accept a lowball estimate without pushing back.
We have seen countless claims where an adjuster’s first estimate missed 40% or more of the actual damage. The carrier’s inspection was technically conducted, test squares were measured, photos were taken, but the scope was tight and the homeowner had no idea they were entitled to more. When those homeowners came to us and we reviewed the hail damage claim documentation they had assembled alongside the carrier’s report, the gap was often obvious.
The uncomfortable truth is that insurance adjusters operate under production pressure. They are often handling dozens of claims after a major storm event. A claim with detailed homeowner documentation, multiple contractor opinions, and a well-organized photo file is harder to under-scope than one with nothing attached. Your documentation doesn’t just support your claim. It signals that you are paying attention.
We’re not suggesting you distrust every adjuster. Many are professional and fair. But the system rewards preparation. If you’ve walked your roof, counted impacts, photographed gutters, and kept your storm date evidence, you’ve already changed the dynamic of your claim. That is not a technical skill. It’s a mindset, and it matters as much as knowing what fishmouthing looks like.
Get help maximizing your hail damage claim
Identifying hail damage is the first step, but navigating the insurance process to a fair settlement is where many homeowners struggle most.

At Vector Claim Solutions, we work as trusted public adjusters representing policyholders, not insurance companies. We specialize in storm damage claims across Nebraska, Iowa, Colorado, Texas, and Florida, and we know exactly how carriers scope and settle hail claims. Whether your claim is just starting or has already been denied or underpaid, our team can review your documentation, conduct a detailed inspection, and negotiate on your behalf. Explore our residential claims support services or learn how insurance actually calculates what you’re owed with our guide on how to maximize your claim payment. You deserve a settlement that reflects the actual damage to your home.
Frequently asked questions
What are the first signs of hail damage I should look for on my roof?
Start with missing shingles and bald spots from granule loss, then look for lifted tabs, cracks, and dents at individual impact points. Checking gutters for granule buildup is also a fast way to confirm that impact damage has occurred.
How does hail damage differ between asphalt shingles, metal, and tile roofs?
Damage manifestations differ by material, with asphalt shingles showing granule loss and cracks, metal roofs developing dents and displaced fasteners, and tile roofs cracking or chipping at corners. The IBHS impact rating framework categorizes these specific damage modes to help consumers and contractors identify what to look for on each surface type.
How do insurance adjusters typically document hail damage for claims?
Adjusters use defined test squares to count impacts in sampled areas and then extrapolate findings across the roof. Because small samples can over- or underestimate actual damage, where and how those squares are placed can significantly affect the claim outcome.
Can I maximize my claim if I document hail damage myself?
Yes. Thorough homeowner documentation including date-stamped photos, impact counts across multiple roof slopes, and supporting evidence from gutters and vents strengthens your position during the claims process. The more specific and organized your file, the harder it is for a carrier to dismiss or undervalue your claim.